Pay your bill, track your utility usage, get outage information, and more in the online account management portal. Menus, both by column and drop down, offer easy navigation to get real time information.
- View your statement and billing history
- View detailed usage information
- Make a payment and save your payment information
- Easily manage multiple accounts
- Receive important outage notifications and alerts
- Submit electric outages
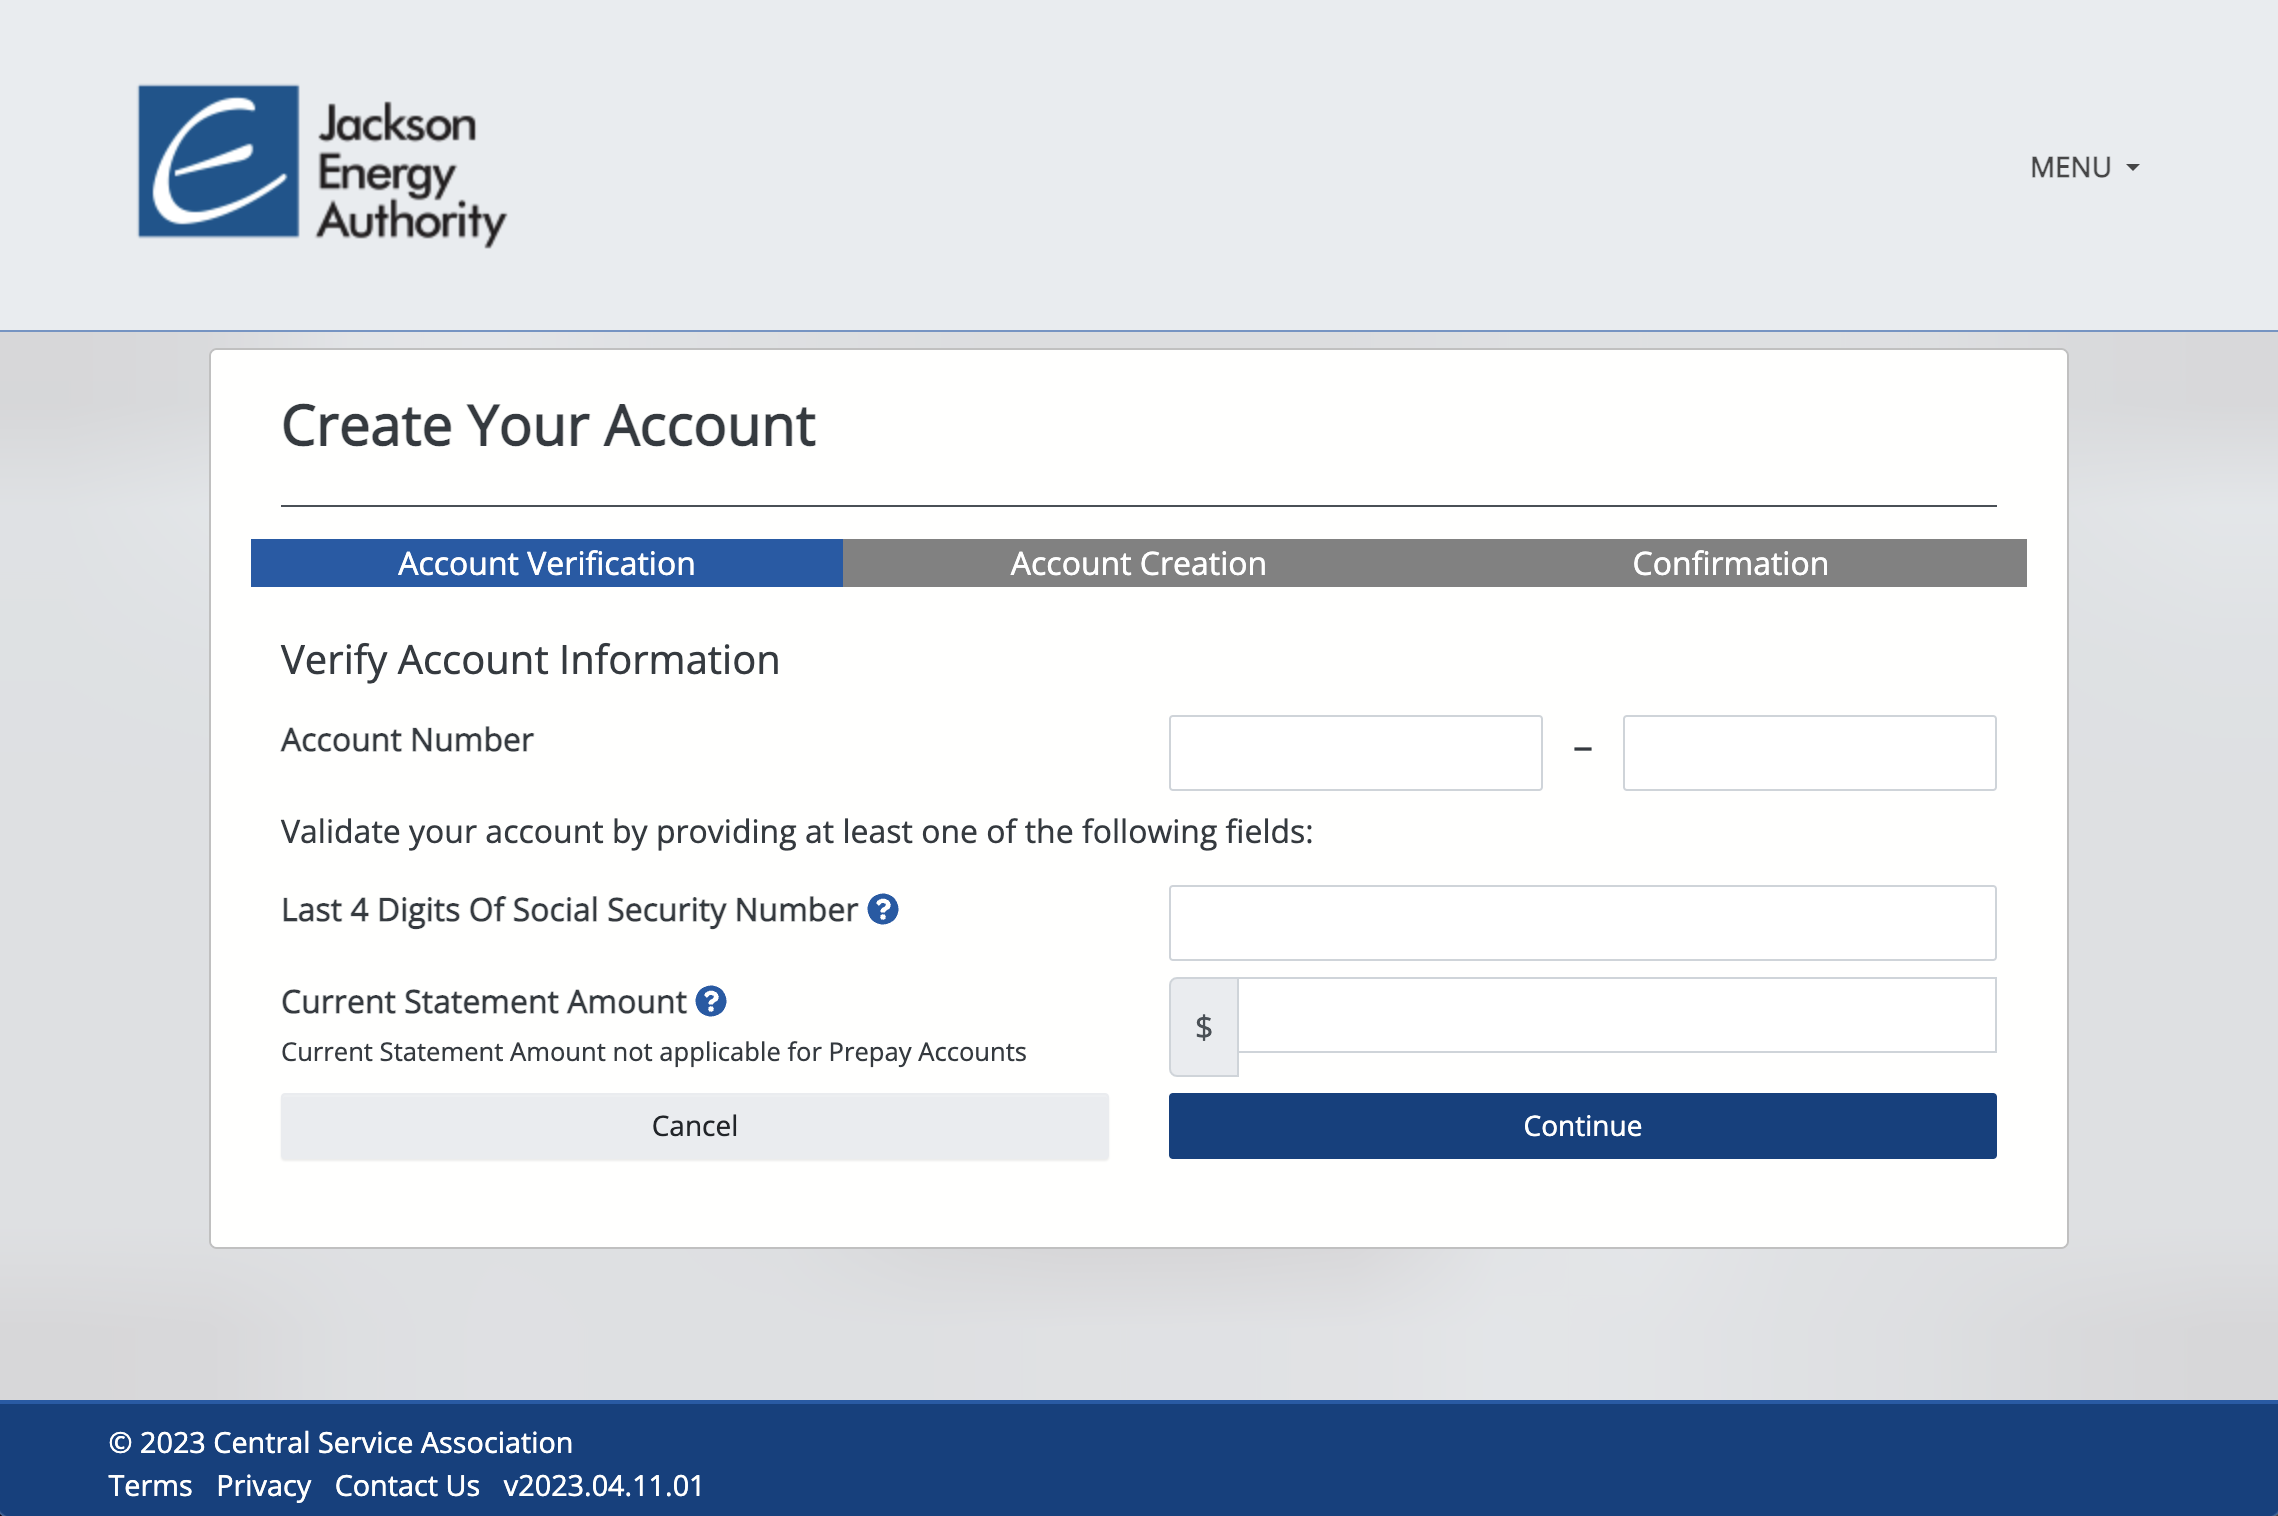
To set up an account, a 12-digit JEA account number and the last 4 digits of the Social Security number tied to the account, or any previous statement amount will be needed. Once setup is complete, functionality between the online portal and app will be seamless.
Sign Up
To help make the sign up process easier, please note the following steps:
- STEP 1: All customers must sign up in the new portal by clicking the grey “Sign Up” button on the Jackson Energy Authority Customer Portal home screen
- STEP 2: Enter the 12-digit JEA account number and validate the account (see images below)
- STEP 3: Once an account has been created, profile details and user preferences can be edited in multiple ways:
- A - By clicking on the “MY PROFILE” link in the blue bar at the top (desktop view)
- B - By clicking the “MENU” link in the top right corner (desktop view)
- C - By clicking the three lines in the top right corner (mobile phone view) and selecting “My Profile”
- D - By clicking “Edit Profile” on the Profile Home page (visible if you have more than one account on your profile).
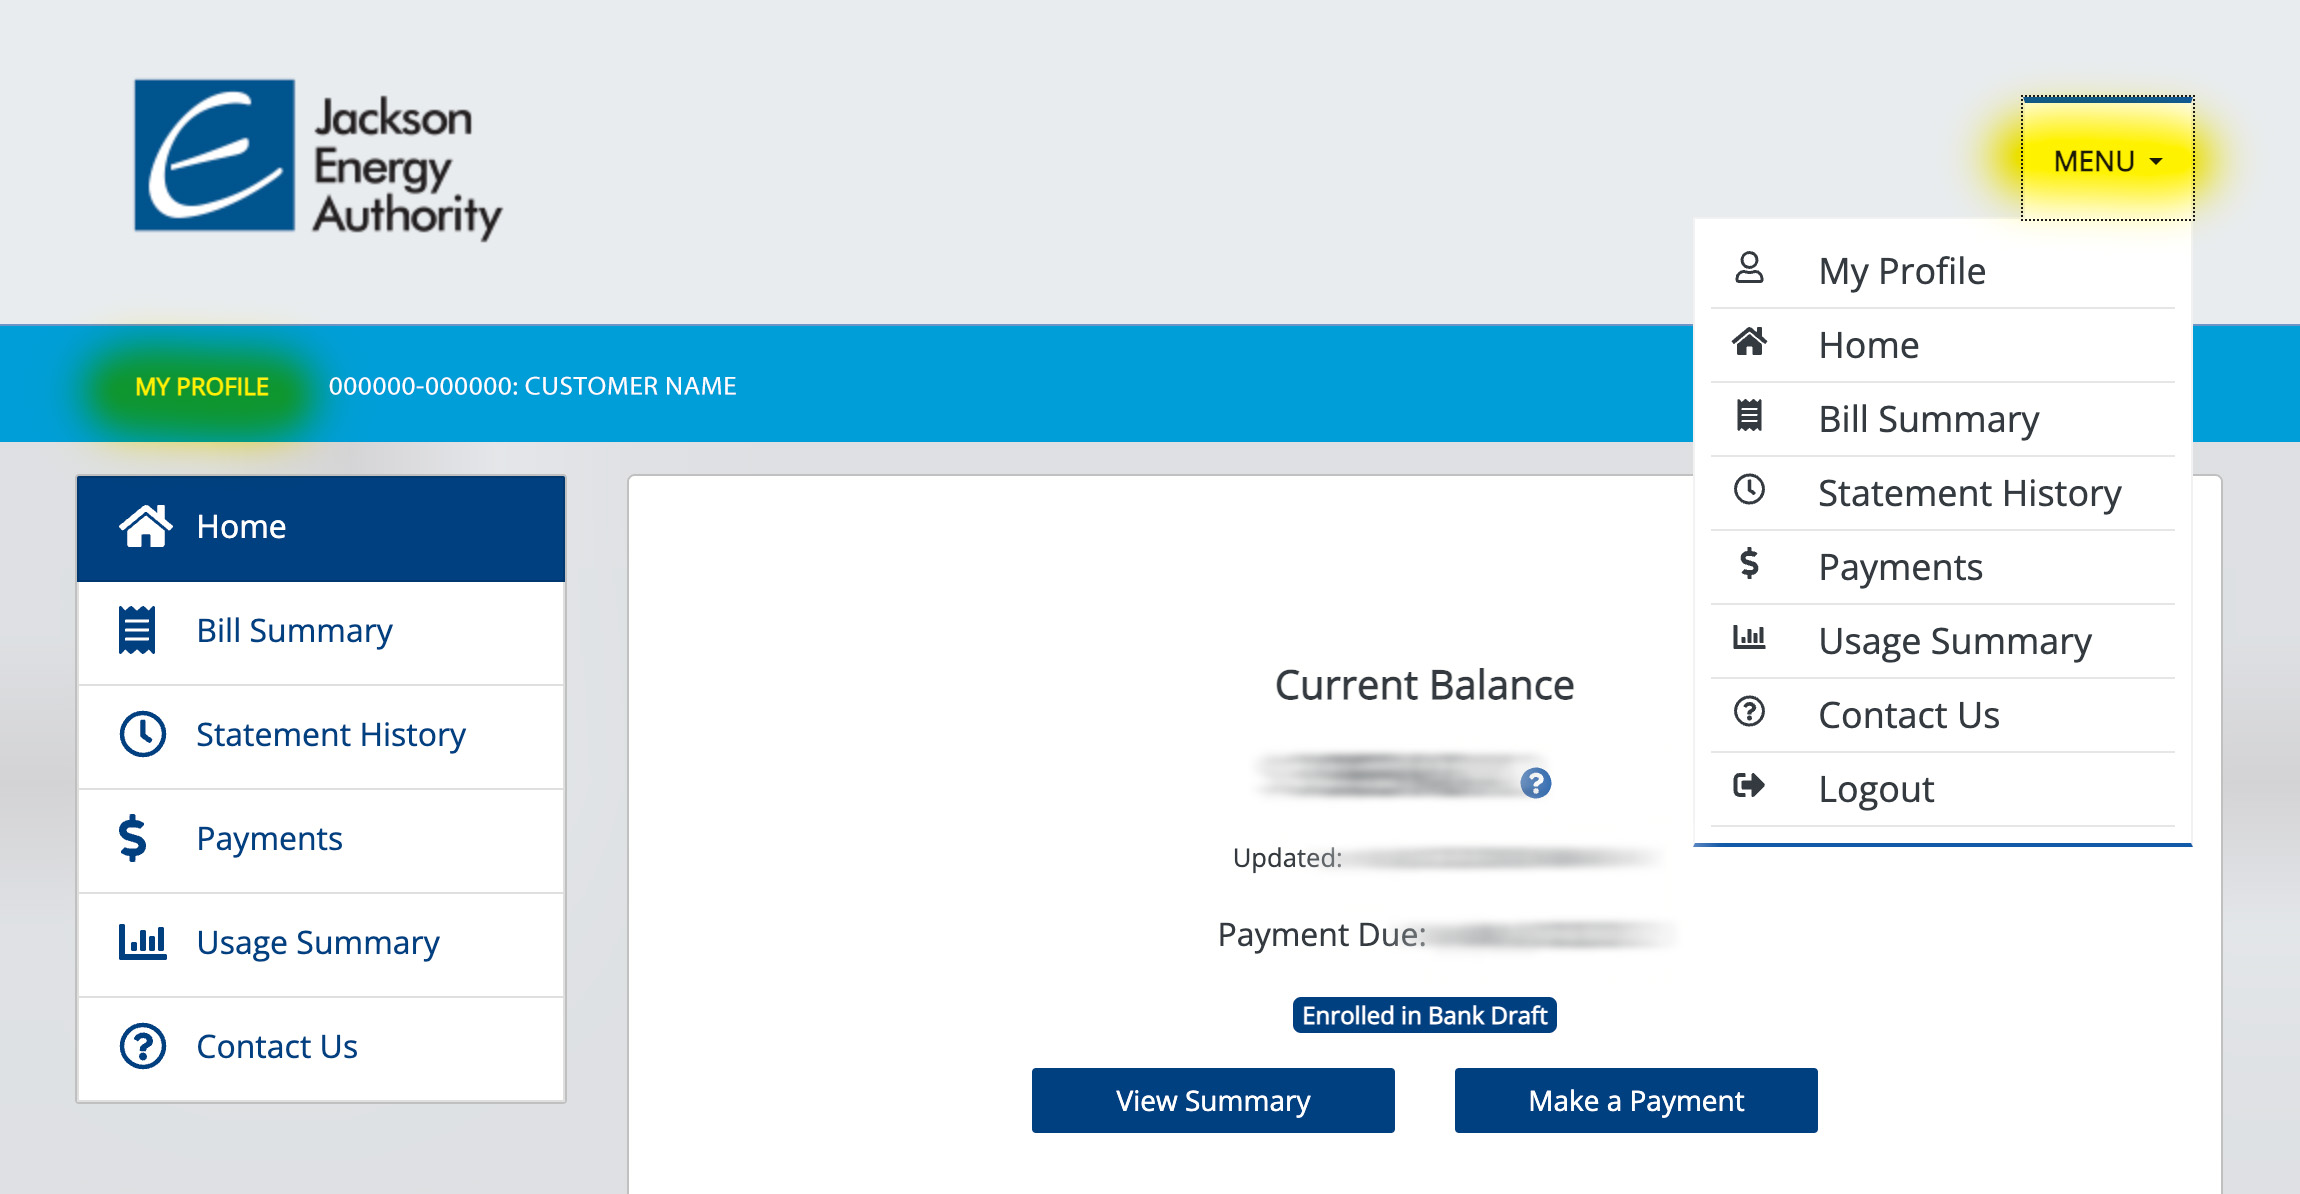
Step 3 A & B
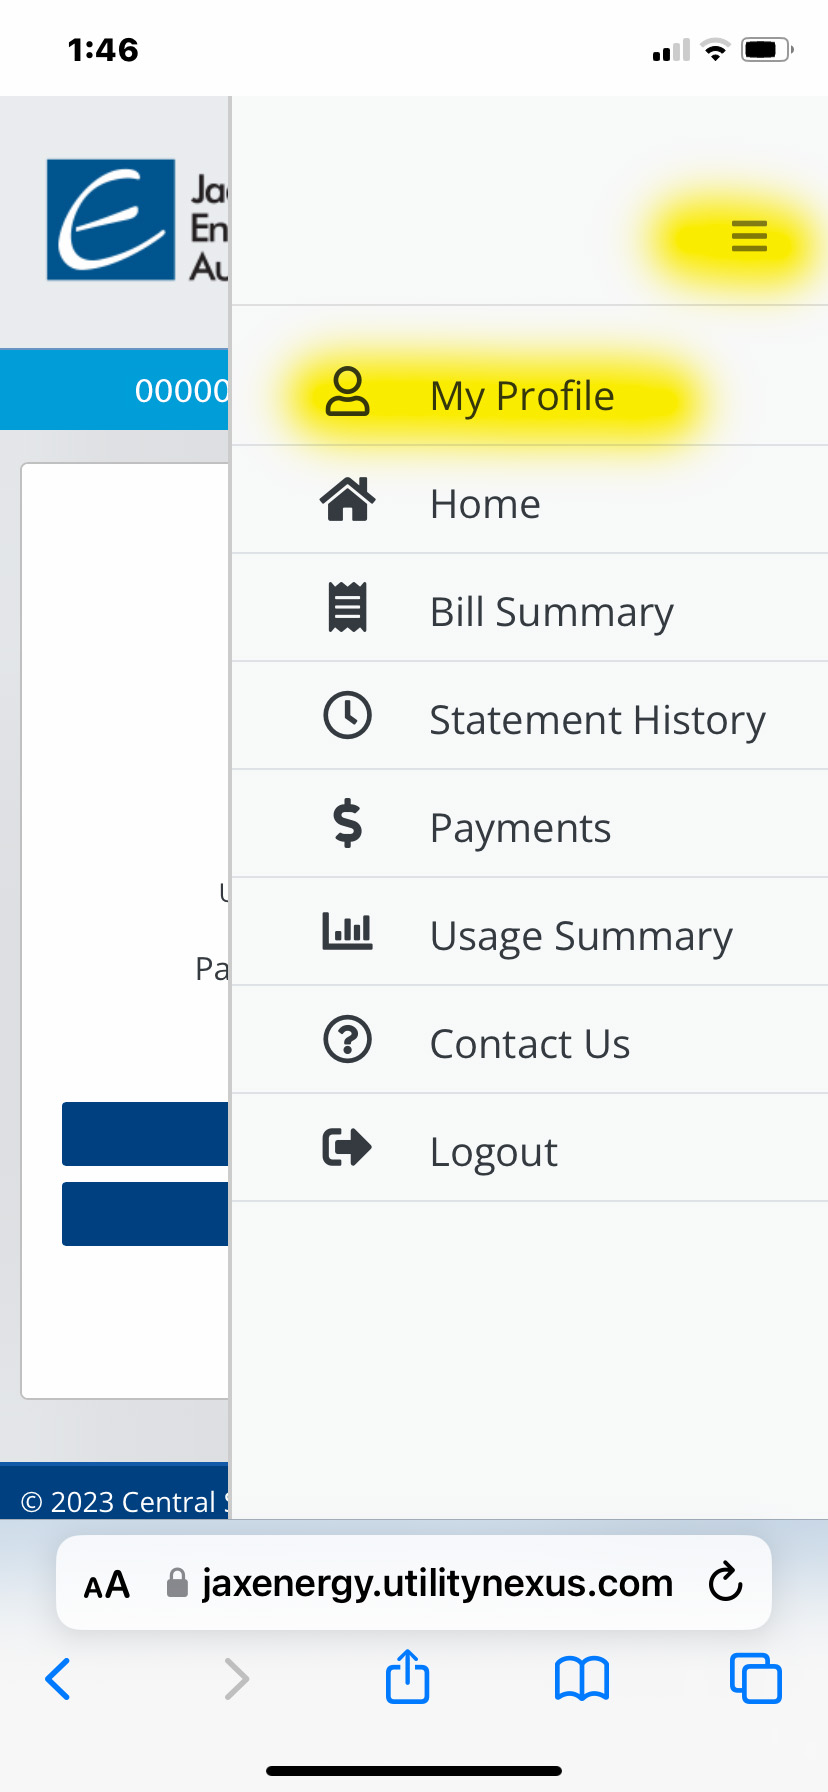
Step 3 C
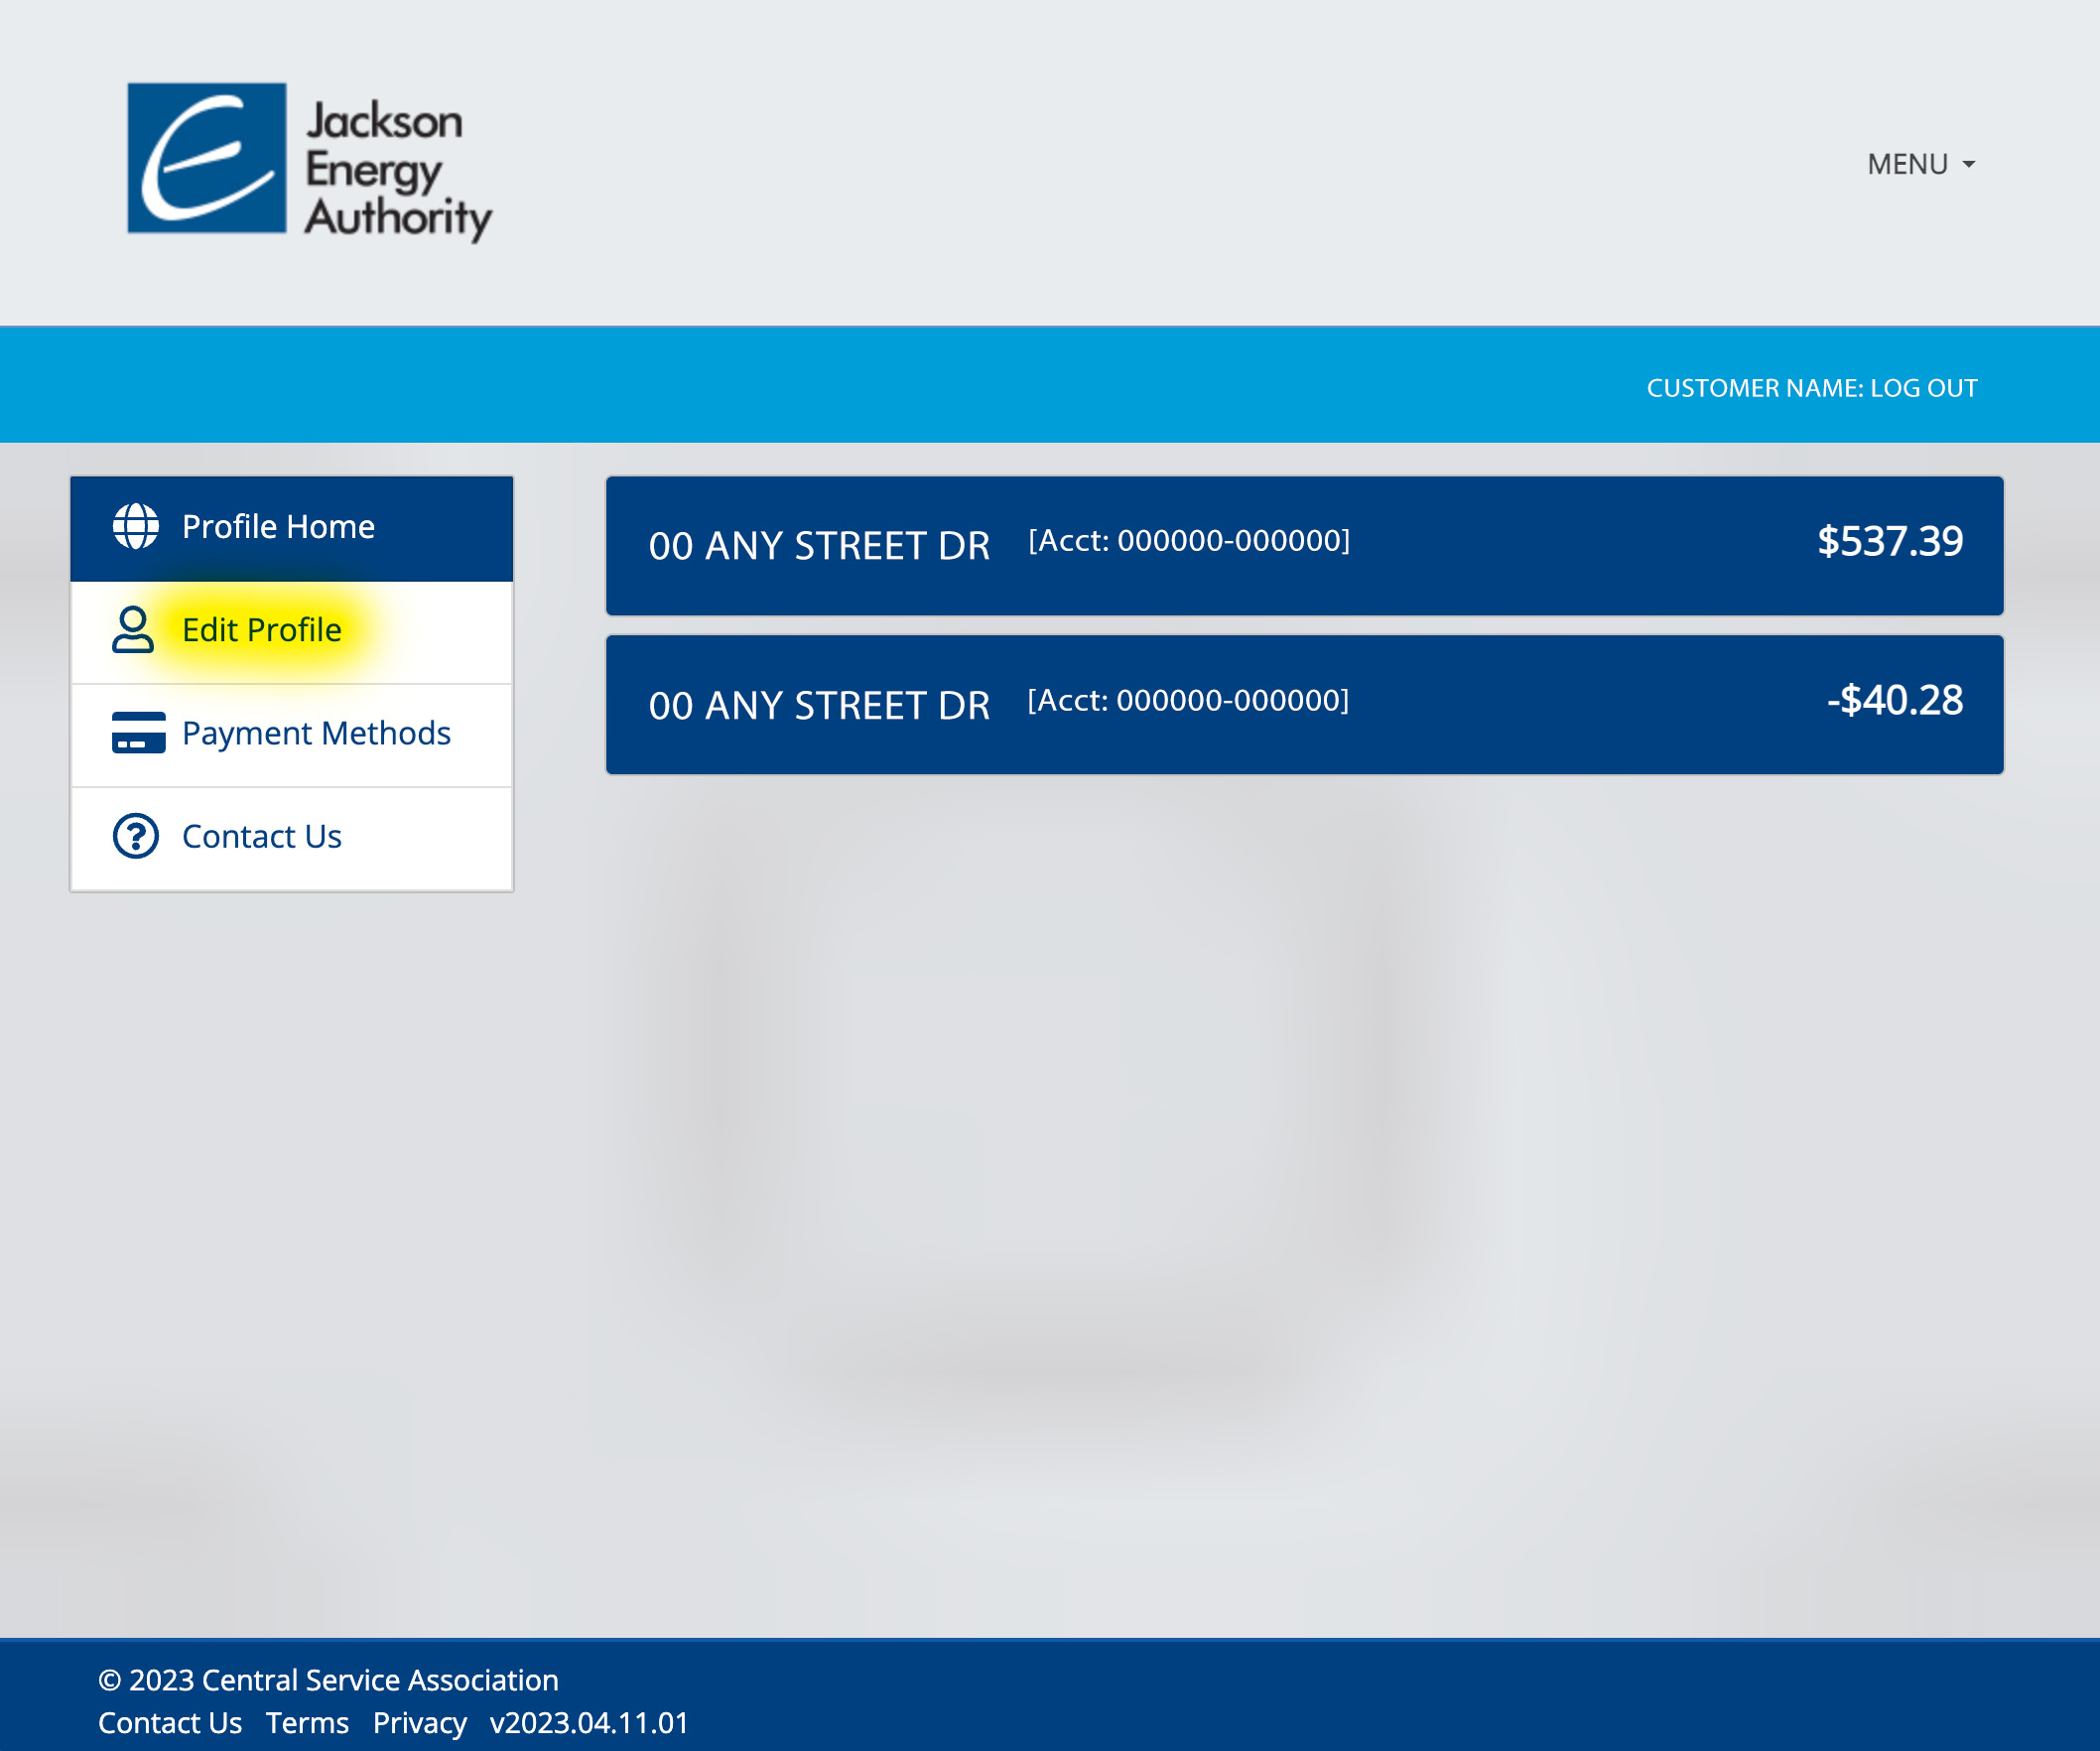
Step 3 D
Autopay Setup (formerly Recurring Payment)
As of June 8, recurring payments should be set up in the new poral by using the "Autopay" feature. If you currently have a payment scheduled after June 7 in the JEA MyBill portal, it needs to be scheduled in the new online account management portal to avoid any delays in payment.
To set up Autopay, please note the following steps:
- Log in to the online account management portal and click “Payments” from the left side menu.
- Click the “Manage Autopay” blue button
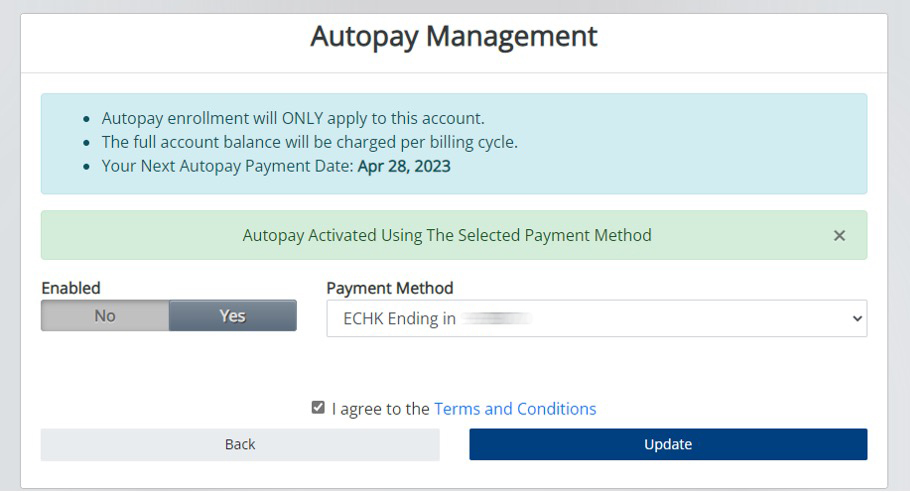
- Click “Yes” to enable autopay then select payment method. Check the box to agree to Terms and Conditions, then click the blue “Update” button
- If a payment method has not been saved, click the drop-down box to “Add new payment method” and follow the prompts to enter credit/debit card or ACH/echeck account info. Check the box to agree to Terms and Conditions, then click the blue “Update” button
- Once updated, a message in a green will say, “Autopay Activated using the selected payment method”
